A time slice is a short slot cut from a longer stretch of time. In an operating system it is the few milliseconds a thread runs before the scheduler gives the core to another thread. In TouchDesigner it is the batch of CHOP samples between the last cook and the current one, and in photography it is one strip of a timelapse frame placed beside strips from other moments.
Every field uses the same idea: split a sequence into slots, then use each slot on its own. Each meaning below has its own section, starting with CPU scheduling, with real numbers and working code.
Key takeaways
- On Linux the CPU slice is 3 ms on an 8-CPU machine, or 2.8 ms on kernels with the 2025 change. Windows counts its quantum in 15.625 ms clock ticks.
- In round-robin scheduling, a shorter quantum gets each task started sooner but adds context switches.
- In TouchDesigner, a time slice holds every CHOP sample since the last cook, so a dropped frame doesn’t drop audio.
- A time-slice photo joins strips from many timelapse frames shot from one locked-off camera.
- You can build every visual version for free with GIMP, Photopea, p5.js or TouchDesigner Non-Commercial.
Jump to your meaning:
- Operating system and CPU: the section “Time slice in an operating system (CPU scheduling)”, including the worked round-robin example
- TouchDesigner: the section “Time slicing in TouchDesigner CHOPs”
- Photography: the sections “Time-slice photography” and “How to shoot a time slice”
- Bullet time and film: the section “Time slice vs slit-scan vs bullet time vs time-lapse”
- After Effects: the section “Time slicing in After Effects”
- Clarity PPM, DVB-H broadcasting and OS/2: the section “Other meanings of time slices”
Fact-checked
We checked these key facts against the sources named, on November 17, 2026:
- Windows counts its quantum in clock ticks of about 15.625 ms (source: learn.microsoft.com)
- Windows counts the slice in clock ticks, which usually last 15.625 ms (source: learn.microsoft.com)
- If TouchDesigner jumps 4 frames, the slice holds 44100 × 4 ÷ 60 = 2,940 samples (source: docs.derivative.ca)
- One 1920 × 1080 RGBA 8-bit frame is about 8.3 MB, so 256 cached frames need roughly 2.1 GB of VRAM (source: rfc-editor.org)
- Its default is 0.75 ms × (1 + ilog(ncpus)), which gives 3 ms on an 8-CPU system, and test machines report 3000000 ns (source: lkml.iu.edu)
What is a time slice? Five meanings, one idea
A time slice is one piece of a continuous sequence, taken out so it can be handled, shown or scheduled separately. The sequence can be CPU time, animation frames, timelapse photos or video. What changes from field to field is what you do with each piece.
In an operating system
A CPU time slice, also called a quantum, is how long a thread may run before the scheduler can preempt it and give the core to another thread. Linux sets it in fractions of a millisecond scaled by CPU count. Windows counts it in clock ticks. The exact values for each system, and a worked round-robin example, are in the CPU scheduling section below.
In TouchDesigner CHOPs
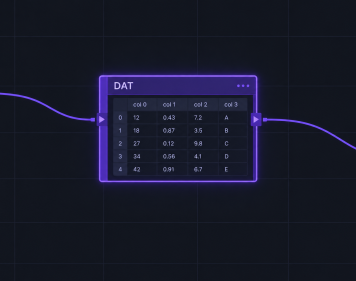
Derivative’s documentation defines a time slice as the time from the last cook frame to the current cook frame. For CHOPs, it is the set of samples that falls in that window. When the project runs smoothly, each slice is one frame long. When frames get skipped, the slice stretches so that no samples are lost.
In photography and art
A time-slice photo comes from a timelapse shot on a locked tripod. Each chosen frame is cut into a strip, and the strips are lined up side by side. The finished image shows midday on one edge and night on the other.
In film: bullet time
The film meaning comes from camera arrays. Many cameras fire at the same moment from different positions, and playing their frames in order moves the viewpoint around a frozen instant. The Matrix (1999) made the effect famous, but Tim Macmillan’s time-slice work dates back to 1980.
Did you know?
In his 2014 IEEE lecture, Tim Macmillan dates his first circular time-slice camera to 1982 at the Slade School of Art, two years after the square camera he built at Bath.
In business software and broadcasting
Broadcom’s Clarity PPM uses “time slices” for reporting buckets. The DVB-H mobile TV standard (ETSI EN 302 304) uses time slicing to save receiver battery, and OS/2 exposed the CPU slice as a CONFIG.SYS setting. All three are covered near the end of the article.
Time slice in an operating system (CPU scheduling)
A CPU time slice is the longest a thread runs before the scheduler may switch to another one. Current Linux kernels default to about 3 ms on an 8-CPU machine (2.8 ms with the 2025 patch). Windows counts the slice in clock ticks, which usually last 15.625 ms.
Round-robin and preemption
Picture a microphone passed around a room. Each speaker gets a fixed slot, and when the slot runs out the host takes the microphone back and moves on. That is round-robin scheduling, and taking the microphone back is preemption.
The length of the slot is a trade-off. Short slices make a desktop feel responsive because every waiting task gets a turn sooner. Each switch also has a cost: the CPU has to save registers, and the next thread starts with a cold cache. A short quantum feels quick but gives up some throughput. A long quantum wastes less time on switching, but interactive programs start to lag behind long-running batch work.
Worked example: round-robin with a 4 ms quantum
Round-robin runs each ready process for one quantum, then moves it to the back of the queue. This example uses four processes. It assumes context switches cost nothing and that a newly arrived process joins the queue before a preempted one goes back.
| Process | Arrival (ms) | Burst (ms) | Finishes at (ms) | Turnaround (ms) | Waiting (ms) |
|---|---|---|---|---|---|
| P1 | 0 | 10 | 24 | 24 | 14 |
| P2 | 1 | 4 | 8 | 7 | 3 |
| P3 | 2 | 7 | 22 | 20 | 13 |
| P4 | 3 | 3 | 15 | 12 | 9 |
Quantum = 4 ms
| P1 | P2 | P3 | P4 | P1 | P3 | P1 |
0    4    8    12   15   19   22   24
Turnaround is finish time minus arrival time, and waiting time is turnaround minus burst. With a 4 ms quantum the average waiting time is 39 ÷ 4 = 9.75 ms, the average turnaround is 15.75 ms, and there are 6 context switches. Here is the same workload with other quantum sizes:
| Quantum | Context switches | Average waiting | Average wait before first run |
|---|---|---|---|
| 2 ms | 12 | 11.25 ms | 2 ms |
| 4 ms | 6 | 9.75 ms | 4.5 ms |
| 8 ms | 4 | 11.75 ms | 8.25 ms |
A 2 ms quantum starts every task fastest, but it doubles the switches. An 8 ms quantum behaves almost like first-come, first-served, and P4 waits 16 ms before it runs at all.
Linux: from CFS to EEVDF
Kernel 6.6 replaced the scheduling algorithm of Linux’s fair scheduler, CFS, with EEVDF (Earliest Eligible Virtual Deadline First). As part of that work, a 2023 tip-bot commit renamed the old min_granularity tunable to base_slice_ns. Its default is 0.75 ms × (1 + ilog(ncpus)), which gives 3 ms on an 8-CPU system, and test machines report 3000000 ns. The base slice also sets the tick preemption point. A 2024 thread on the Linux kernel mailing list (LKML) confirms that a task becomes eligible for preemption at the tick once its default slice is used up.
In February 2025, a patch by zihan zhou titled “sched: Reduce the default slice to avoid tasks getting an extra tick” was merged into the tip sched/core tree as commit 2ae891b826, and Peter Zijlstra committed it. It lowered the constant to 0.70 ms. The patch fixes a rounding problem. On a kernel with a 1,000 Hz tick (1 ms per tick), a 3 ms slice often let a task run for four tick periods instead of three, and a 2.8 ms slice ends inside three. The change had a cost: the kernel test robot flagged a 6.2% hackbench throughput regression on the commit. The reviewer K Prateek Nayak also pointed out that most servers are built with CONFIG_HZ=250, where one tick already lasts 4 ms, so he expected little visible difference on those machines.
Scaling by CPU count stops at 8, so a 64-core server gets the same base slice as an 8-core laptop:
| CPUs | Multiplier (1 + ilog) | Base slice at 0.75 ms | Base slice at 0.70 ms (2025 patch) |
|---|---|---|---|
| 1 | 1 | 0.75 ms | 0.70 ms |
| 2 to 3 | 2 | 1.5 ms | 1.4 ms |
| 4 to 7 | 3 | 2.25 ms | 2.1 ms |
| 8 or more | 4 | 3 ms | 2.8 ms |
Windows quantum and clock ticks
On Windows, the hardware abstraction layer (HAL) sets the clock interval, not the kernel. Microsoft’s embedded team measured it with Sysinternals ClockRes at a typical 15.625 ms. The Windows Internals editions that cover XP and Vista give client threads a default quantum of 2 clock intervals and Server threads 12. Threads in the foreground process can get up to 6 ticks so the window you are using stays responsive. Microsoft has reworked the scheduler since then, so treat these as reference values rather than guaranteed Windows 11 behaviour.
| OS / scheduler | How the slice is set | Typical value | How to check | Period / source |
|---|---|---|---|---|
| Linux EEVDF (6.6+) | base_slice_ns, scaled by CPU count |
3 ms on 8 CPUs (0.75 ms base) | cat /sys/kernel/debug/sched/base_slice_ns as root |
2023 tip-bot commit renaming min_granularity to base_slice |
| Linux EEVDF, with the 2025 patch | Same tunable, 0.70 ms base | 2.8 ms on 8+ CPUs | Same path | Commit 2ae891b826, “Reduce the default slice”, Feb 2025 |
| Linux CFS (pre-6.6) | min_granularity plus target latency |
Depends on load and CPU count | /sys/kernel/debug/sched/ |
Older kernels |
| Windows client | Clock ticks × quantum count | 2 ticks ≈ 31.25 ms at 15.625 ms | Sysinternals ClockRes for the tick | Windows Internals (XP/Vista era) |
| Windows Server | Clock ticks × quantum count | 12 ticks ≈ 187.5 ms | ClockRes | Windows Internals (XP/Vista era) |
Check your own machine
On Linux, mount debugfs if it isn’t already mounted, read base_slice_ns, and divide by 1,000,000 to get milliseconds. On Windows, run clockres from Sysinternals, which reports the maximum, minimum and current timer interval. Media players and games often lower the current interval while they run, so the reading can change between runs.
Time slicing in TouchDesigner CHOPs
Time slicing keeps CHOP channels smooth when the frame rate drops. According to Derivative, it also stops audio from popping when the timeline skips frames. A time-sliced CHOP doesn’t calculate a whole clip. On each cook it works out only the samples needed since the previous cook and passes that one slice down the network.
What a time slice contains
The number of samples in a slice depends on two things: how many frames have passed since the last cook, and the CHOP’s sample rate compared with the timeline rate.
samples in slice = sample rate × frames since last cook ÷ timeline fps
Derivative’s Time Slice page uses a 60 fps timeline and 44,100 Hz audio as its example. If TouchDesigner jumps 4 frames, the slice holds 44100 × 4 ÷ 60 = 2,940 samples. All the audio still arrives, just in one larger batch.
| Timeline rate | Channel sample rate | Frames since last cook | Samples in the slice |
|---|---|---|---|
| 60 fps | 60 Hz (control data) | 1 | 1 |
| 60 fps | 60 Hz | 4 (dropped frames) | 4 |
| 60 fps | 44,100 Hz | 1 | 735 |
| 60 fps | 44,100 Hz | 4 | 2,940 |
| 60 fps | 48,000 Hz | 1 | 800 |
| 30 fps | 48,000 Hz | 1 | 1,600 |
This is how audio CHOPs can run at 44.1 kHz while the rest of the network cooks at 60 fps. Each cook moves a block of samples, and the block gets bigger when the machine falls behind.
Time-sliced vs non-time-sliced CHOPs
The setting is a parameter called Time Slice on the Common page of every CHOP. TouchDesigner turns it on or off automatically for most operators, but you can change it on generators such as the Noise CHOP.
| Behaviour | Time Slice on | Time Slice off |
|---|---|---|
| What the CHOP holds | Only the current slice of samples | A whole clip with a fixed start and end |
| Length | Grows and shrinks with cook timing | Set by Start/End on the Channel page |
| Typical use | Live control, audio, sensors, LFOs | Lookup tables, fixed curves, stored clips |
| Noise CHOP extras | Reset Pulse becomes available | Transform constraints (Start/End/Mean Value) work |
| Noise CHOP limits | Harmonic Summation and Brownian can’t be limited to 1 | All noise types available |
The last two rows come from Derivative’s Noise CHOP documentation. A constraint like “end at this value” needs a known end point. A time-sliced channel has no end point, so those constraints only work with Time Slice off.
Quick steps: see time slicing in action
- Add a Noise CHOP and look at its viewer.
- On the Common page, turn Time Slice off and see the whole noise curve.
- Turn Time Slice on and watch it become one moving value.
- Connect a Trail CHOP to see that value over time.
- Add a Perform CHOP and watch its cook channel while you stress the project.
When frames drop: Time Slice CHOP and Perform CHOP
The Time Slice CHOP fills in values between cooks when TouchDesigner can’t cook fast enough to keep up. It has three methods: Hold, Linear and Trim. Hold keeps one constant value for each cook. Linear interpolates from the last cooked value to the current one.
Derivative’s example is a slider cooked at frames 231 and 235. In Linear mode, frames 232 to 234 get interpolated values instead of a sudden jump. Use it on control channels that drive motion, such as a camera position, so a stutter doesn’t become a visible snap.
To check whether you are dropping frames, use the Perform CHOP. Its cook channel reads 1 when a frame cooks and 0 when one is skipped, and a timeslicestep channel reports the slice length in frames. Connect cook to a Trail CHOP and every skipped frame shows up as a dip.
Studio tip
If a time-sliced audio chain pops, check the Perform CHOP’s timeslicestep before adding buffers. A step that keeps going above 1 means the problem is your cook time, not the audio settings.
Visual time slicing in TOPs: the Time Machine TOP
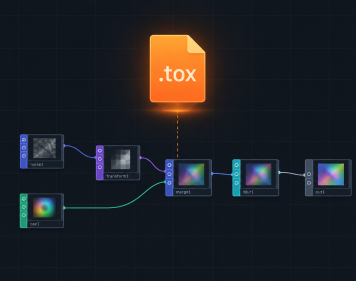
In TouchDesigner, the equivalent of a time-slice photo is built from TOPs. A lesson in Derivative’s Intermediate course stores recent frames in a Texture 3D TOP. A Time Machine TOP then reads a second input as a time map, where the brightness of each pixel decides which stored frame that pixel shows. A Ramp TOP as the map gives classic slit-scan, and a circular ramp makes time ripple outward from the centre.
For plain delays, a Cache TOP with Cache Select TOPs is simpler. That gives you a whole frame from the past rather than a different moment for each pixel.
Heads up
Frame caches use GPU memory. One 1920 × 1080 RGBA 8-bit frame is about 8.3 MB, so 256 cached frames need roughly 2.1 GB of VRAM. The free Non-Commercial licence also caps resolution at 1280 × 1280.
Time-slice photography: how one image holds a whole evening
A time-slice photo is a single image built from strips of many photos, all taken from the same spot over minutes or hours, with each strip showing a different moment. The Los Angeles photographer Dan Marker-Moore is one of the best-known people working in the form. Features in Amateur Photographer and Picture Correct use his work as their main example.
Real shoots: frames, duration and time between slices
Marker-Moore’s portfolio at danorst.com lists the shoot data under each piece. The last column below is duration ÷ slices, and it is the number that most affects how each image looks.
| Location | Photos in slice | Time span | Source lapse | Minutes between slices |
|---|---|---|---|---|
| Big Ben, London | 118 | 1 h 36 min | 617 frames (animation of 159 slices) | 0.8 (about 49 s) |
| Downtown Los Angeles and Mt. Baldy | 53 | 1 h 12 min | 1,200 frames | 1.4 |
| Shanghai, from the Bund | 44 | 1 h 20 min | 444 frames | 1.8 |
| Victoria Peak, Hong Kong (lightning storm) | 25 | 45 min | 925 frames | 1.8 |
| Chicago River | 52 | 12 h 14 min | 2,785 frames | 14.1 |
The gap between slices ranges from under a minute to about 14 minutes. Big Ben’s strips are close enough together in time that the sky reads as one smooth gradient. The Chicago River strips are so far apart that each one shows clearly different light. A lot of shooting sits behind those few dozen strips. Picture Correct reports that Marker-Moore shot well over 30,000 images for his Hong Kong and Shanghai day-to-night project, and Amateur Photographer puts a single time-slice image at around 700 frames shot.
Slices, interval and duration: the three settings that matter
Three numbers decide the result.
- Duration is the total time the image covers. A sunset needs about 1 to 2 hours, and a full day-to-night slice needs 10 hours or more.
- Interval is the gap between shots. Shorter intervals give you more frames to choose from when you pick your slices.
- Slice count is how many strips the final image has. More slices give smoother gradients and thinner strips. Fewer slices give bold, graphic bands.
Duration ÷ slices is the real time between neighbouring strips. That is why the same skyline can read as a gentle gradient or a row of colour blocks, depending only on how many strips you cut it into.
Choosing the subject: skylines, sunsets, day-to-night
A good subject changes a lot over time but doesn’t move in the frame. City skylines are the classic choice: the sky changes colour and windows light up one by one while the buildings stay put.
Other subjects that work well:
- Harbours with tides
- Mountains under moving light or storms
- Busy squares, where crowds thin out after dark
Avoid scenes where large shapes cross the seams, such as boats close to the camera.
Strip direction and the order of time
Vertical strips running left to right are the default, but you have other options:
- Vertical: time runs across the frame. This suits wide skylines.
- Horizontal: time runs down the frame. It works when the sky is at the top and the lights come on lower down.
- Diagonal: this looks more dynamic and can follow a riverbank or a road.
- Radial: time spreads out from a point, like a clock face. Put the sun or a landmark at the centre.
The order of time changes how the image reads. Put the sunset side of the sky first, so time moves the same way as the light. If time runs against the light, the image feels wrong even when viewers can’t say why.
How to shoot a time slice
Lock the camera, keep the exposure fixed or ramp it smoothly, and shoot far more frames than you plan to use. The planning is simple arithmetic.
Planning math: frames, interval and number of slices
Frames shot = duration ÷ interval. Frames between slices = frames shot ÷ slices. Strip width = image width ÷ slices. Here are typical plans for a 6000-pixel-wide image from a 24-megapixel sensor:
| Event length | Interval | Frames shot | Slices used | Strip width at 6000 px |
|---|---|---|---|---|
| 30 min (fast sunset) | 2 s | 900 | 30 | 200 px |
| 1 h 36 min | 10 s | 576 | 118 | about 51 px |
| 2 h (sunset to blue hour) | 5 s | 1,440 | 24 | 250 px |
| 2 h | 10 s | 720 | 40 | 150 px |
| 12 h (day to night) | 15 s | 2,880 | 52 | about 115 px |
Should you use every 10th frame or every 20th? There is no fixed rule. Use a step of (frames − 1) ÷ (slices − 1) so that both the first and last frames are included. For 1,440 frames and 24 slices, that comes to about every 63rd frame.
Then adjust by hand. If a chosen frame has a passing bus or a camera flash in the wrong strip, swap it for a neighbouring frame. With plenty of frames to spare, you are choosing moments, not just spacing them out.
Studio tip
Plan for at least 10 frames shot for every slice you use. The spare frames let you skip blinks, planes and passers-by without breaking the rhythm of the strips.
Camera settings and intervalometers
- Tripod lock: use a heavy tripod and turn lens stabilisation off. Protect the setup from wind and from people bumping into it.
- Focus: focus once, then switch to manual focus so the lens doesn’t hunt as the light fades.
- Exposure: manual exposure works for short sunsets. Day-to-night shoots need “holy grail” ramping, where you change exposure in small, even steps as the light drops. Uneven changes show up as brightness jumps at the seams.
- White balance: fix it, or correct it in a batch afterwards. Auto white balance makes seams visible.
- Intervalometer: most current cameras have one built in. Dedicated timelapse cameras, such as those from Enlaps, are designed for long day-to-night runs.
Building it in Photoshop, GIMP or Photopea
Load the chosen frames as layers in time order, add one guide column per frame, then mask each layer so only its own strip shows. Photoshop, GIMP (free) and Photopea (free in the browser) can all do this. Only the menu names differ.
- Batch-correct the selected frames for exposure and white balance first.
- Load them as layers in one file (in Photoshop: File > Scripts > Load Files into Stack). The first moment can go at the bottom or the top, but be consistent.
- Add guides. In Photoshop, use View > New Guide Layout with one column per image. In GIMP, use Image > Guides > New Guide for each position, or a guide script. Photopea has a similar guide layout dialog.
- On each layer, select its column and add a layer mask that shows only that strip.
- Check the seams at 100% zoom, and move guides onto vertical edges in the scene where you can.
- Flatten a copy, then do the final grading on the composite.
Hard edges vs feathered seams
Hard edges give a striped, graphic look in which each moment reads as its own band. Feathering the masks by about 5 to 20 pixels blends neighbouring moments into a gradient. Hard edges suit a small number of slices with strong colour differences. Feathered seams suit many slices and a smooth change from day to night.
Seams look harsh when the exposure jumps between neighbouring frames. Feathering hides small jumps, but large ones need a matching Levels adjustment on that layer.
Studio tip
Put seams along vertical lines in the scene, like building edges, poles and window mullions. A cut that lines up with a real edge disappears.
Fixing alignment drift
Frames drift even on a tripod. Heat expands metal, tripod legs settle into soft ground and wind moves long lenses. Fix the drift before masking. In Photoshop, select all the layers and use Edit > Auto-Align Layers. In GIMP, set each layer to the Difference blend mode over the first frame and nudge it until the buildings turn black. Crop the edges afterwards. On the next shoot, hang a bag from the tripod hook and keep the legs off soft soil.
Code your own time slice in p5.js
In code, a time slice comes down to one rule: choose which frame each region of the output comes from. Store frames in an array, then use image() or copy() to pull each region from the frame its time map points to. The Coding Train (Daniel Shiffman) covers this in a Slit-Scan Video lesson and in Coding Challenge #164 Slitscan. p5.js is free and runs in any browser.
Sketch 1: strips from a photo sequence
This version turns a folder of timelapse frames into a still time slice. Resize the frames to about 2000 px wide first, because browsers struggle with very large canvases.
const N = 24;            // number of photos (slices)
let photos = [];

function preload() {
  for (let i = 0; i < N; i++) {
    photos.push(loadImage('frames/frame_' + nf(i, 3) + '.jpg'));
  }
}

function setup() {
  const w = photos[0].width, h = photos[0].height;
  createCanvas(w, h);
  const sw = w / N;
  for (let i = 0; i < N; i++) {
    const x = round(i * sw);
    // strip i comes from photo i, at the same place in the frame
    copy(photos[i], x, 0, ceil(sw), h, x, 0, ceil(sw), h);
  }
  saveCanvas('time-slice', 'png');
}
The key detail is that the source and destination rectangles are the same. Each strip stays where it is in the frame, and only its moment changes.
Sketch 2: webcam slit-scan with a frame buffer
Live slit-scan applies the same idea to a rolling buffer. Row 0 shows the current frame and lower rows show older frames, so movement smears and bends.
let cam, history = [];
const DEPTH = 60;        // how many past frames to keep

function setup() {
  createCanvas(640, 480);
  pixelDensity(1);
  cam = createCapture(VIDEO);
  cam.size(640, 480);
  cam.hide();
}

function draw() {
  history.unshift(cam.get());              // newest frame at index 0
  if (history.length > DEPTH) history.pop();
  const rows = 60, rh = height / rows;
  for (let i = 0; i < rows; i++) {
    const f = history[min(i, history.length - 1)];
    image(f, 0, i * rh, width, rh, 0, i * rh, width, rh);
  }
}
Many older slit-scan tutorials load p5.dom.js and fail on current versions. Since p5.js 1.0, createCapture() and the other DOM functions are part of the core library, so deleting the p5.dom script tag usually gets the sketch working again. Also replace any capture.loadPixels() loops that copy single pixels with region copies like the one above, which run much faster.
Sketch 3: time maps from gradients, noise or the mouse
A time map is a function that returns a value from 0 to 1 for each region. A value of 0 means now and 1 means the oldest frame in the buffer.
- A horizontal gradient gives classic strips.
(x + y) / (width + height)gives diagonals.- Distance from the mouse gives radial ripples.
noise(x * 0.008, y * 0.008, t)gives organic, melting time. If noise fields are new to you, a Perlin noise primer is the best place to start.
The live sketch at the end of this article includes all four modes.
Performance: memory per buffered frame
Each RGBA frame takes width × height × 4 bytes. At 640 × 360 that is about 0.92 MB, so 48 frames use about 44 MB. At 1920 × 1080 each frame is 8.3 MB, and 60 frames need about 500 MB. Keep buffers small, and record every 2nd or 4th frame to cover more time with less memory. Calling get() every frame also creates garbage, so reusing a pool of createGraphics() buffers as a ring runs more smoothly.
Time slice vs slit-scan vs bullet time vs time-lapse
All four techniques work with time, but each one changes something different across the frame. A time slice uses one camera and changes the moment across the image. Bullet time uses many cameras and changes the viewpoint around a single moment.
| Technique | Cameras | What varies across the frame | Output | Typical tools | Famous example |
|---|---|---|---|---|---|
| Time-slice photo | One, locked | Moment, in strips | One still image | Photoshop, GIMP, Photopea | Dan Marker-Moore’s skyline slices |
| Slit-scan | One (or a moving slit) | Moment, per line or pixel | Still or video | After Effects, TouchDesigner, p5.js | The stargate in 2001: A Space Odyssey |
| Bullet time (camera-array time-slice) | Many, in an arc | Viewpoint, at one moment | Video moving around a frozen instant | Camera rigs, VFX compositing | The Matrix (1999) |
| Time-lapse | One | Nothing (each frame is one moment) | Sped-up video | Any camera with an intervalometer | Day-to-night city lapses |
Did you know?
Guinness World Records lists The Matrix bullet-time sequence under “most still cameras used in a sequence” and credits the Wachowskis with 120 specially modified cameras.
A short history of slicing time
Douglas Trumbull’s slit-scan rig produced the stargate sequence in 2001: A Space Odyssey (1968), the best-known analogue slit-scan.
Tim Macmillan began his time-slice work in 1980 at Bath Academy of Art, shooting 16mm film with arrays of pinhole cameras. He founded Time-Slice Films Ltd in 1997, two years before The Matrix made bullet time a household term.
In March 2005, the artist Golan Levin started An Informal Catalogue of Slit-Scan Video Artworks and Research on his site, Flong. It defines digital slit-scan as joining thin slices from a sequence of video frames into a new image, and it lists works by Toshio Iwai, Eddie Elliott and dozens of others. It is still the best overview of the field.
Time slicing in After Effects
In Adobe After Effects, the built-in slit-scan tool is the Time Displacement effect. You pick a displacement layer, and the brightness of each pixel in that layer decides which point in time the pixel is drawn from. A gradient gives sweeping slit-scan, and a blurred, animated noise layer gives liquid time.
The two settings that matter most are Max Displacement Time (how far back or forward the effect reaches, in seconds) and Time Resolution (how many distinct moments it can sample). Most of the warped, time-bending clips people ask about are this effect with a gradient map applied to footage with strong motion.
If the result looks stepped or banded, raise Time Resolution first. Then switch the project to 16 or 32 bits per channel so the gradient has more than 256 levels. Those two changes usually fix the problems that send people looking for a third-party plugin.
Other meanings of time slices
Outside scheduling and art, “time slice” appears in project-management software, mobile broadcasting and older operating systems. In each case it still means cutting time into slots and handling each slot separately.
Clarity PPM time slices
In Broadcom’s Clarity PPM (formerly CA PPM), time slices are how the system groups time-scaled values such as actuals, estimates, baselines, availability and allocations into reporting periods. Administrators set them up under Administration > Data Administration > Time Slices, as Broadcom’s “Configure Time Slices” documentation describes. Each slice request has:
- a Slice Period, the unit (such as daily, weekly or monthly)
- a From Date and Number of Periods, which set the range
- a Rollover Interval, which sets how often the range moves forward
Clarity works out the Expiration date itself, as the date of the next rollover. Broadcom’s best-practice guidance warns against daily slices that cover more than two years, and its Data Warehouse slices now roll over quarterly to improve performance.
DVB-H broadcasting
In DVB-H, the mobile TV standard ETSI adopted as EN 302 304 in November 2004, time slicing is mandatory. The transmitter sends each service in short, high-bitrate bursts. Between bursts, the receiver turns its radio front end off until the next burst is due. The EBU Technical Review describes front-end power savings of up to 90 to 95% compared with DVB-T. The actual figure depends on how long the receiver is on compared with how long it is off, and on how many services share the stream. Roughly ten or more burst services are needed to reach about 90%.
OS/2
A TIMESLICE line in OS/2’s CONFIG.SYS set the minimum and maximum CPU slice in milliseconds. It was an early example of an operating system letting users set the quantum directly.
FAQ
What does time slice mean?
It means a short portion of time taken from a longer sequence and handled on its own. In computing, that is a thread’s turn on the CPU. In TouchDesigner, it is the CHOP samples since the last cook. In photography, it is a strip from one timelapse frame.
What is a time slice in an operating system?
It is the quantum, the longest a thread runs before the scheduler can preempt it. Linux EEVDF uses 3 ms on an 8-CPU machine (2.8 ms on kernels with the 2025 patch). Windows counts its quantum in clock ticks of about 15.625 ms.
How does the quantum size affect round-robin scheduling?
A smaller quantum gets every process started sooner but adds context switches. In the four-process example above, a 2 ms quantum needs 12 switches and an 8 ms quantum needs 4. The 4 ms quantum gives the lowest average waiting time, 9.75 ms.
What does the term “slice” mean?
A slice is a thin portion cut from something larger. The thing being cut can be an image, a stretch of time, an array or a CPU’s schedule.
What is slicing in computing?
In programming, slicing means taking part of a sequence, like list[2:5] in Python. In scheduling, it means dividing CPU time into quanta. In TouchDesigner, it means cooking CHOP data in batches between frames.
How many photos do you need for a time slice?
Most finished images use between about 20 and 120 slices. Shoot far more than that: the Marker-Moore pieces in the table above draw from lapses of 444 to 2,785 frames, and Amateur Photographer reports around 700 frames for a single image.
What is the difference between time slice and slit-scan?
A time-slice photo uses a small number of wide strips, each from a separate photo, so the result looks banded. Slit-scan uses very thin slices or a different moment for each pixel, usually from video, so the result looks continuous.
Is time slice the same as bullet time?
No. A photographic time slice uses one camera and many moments, while bullet time uses many cameras at one moment. Tim Macmillan called his camera-array work time-slice, which is why the two terms get mixed up.
How do I make a time slice in After Effects?
Put your footage in a comp and add a gradient or noise layer to use as the displacement layer. Apply Time Displacement to the footage, choose that layer and set Max Displacement Time. If the result looks stepped, raise Time Resolution.
Can I make a time slice in GIMP or Photopea for free?
Yes. Both support layers, guides and layer masks, which is all the method needs. Photopea runs in the browser, and GIMP is free open-source software.
What are time slices in Clarity PPM?
They are the reporting buckets Clarity uses to store time-scaled data such as actuals, estimates and availability by day, week or month. Administrators set the Slice Period, From Date, Number of Periods and Rollover Interval for each one.
What is time slicing in DVB-H?
It is the method of sending each mobile TV service in short bursts so the receiver can turn its radio off between them. It is mandatory under ETSI EN 302 304, and it can cut front-end power by up to about 90%.
Try it live
This sketch draws a skyline that goes from day to night and back, records it into a ring buffer, and rebuilds every frame from different moments. Press 1 to 4 to switch the time map. In strip mode, move the mouse to change the number of slices.
// Time slice playground: a made-up skyline goes from day to night and back.
// We record it into a ring buffer, then rebuild the canvas from many moments.
// Keys: 1 strips, 2 diagonal, 3 radial from the mouse, 4 noise time map.
// In strip mode, move the mouse left and right to change the number of slices.

const BUF = 48;       // frames kept in memory (our mini timelapse)
const INTERVAL = 4;   // record one frame every 4 draw() calls
const CELL = 10;      // block size in pixels for the time-map modes
const DAY = 600;      // draw() calls for one full day-night-day loop
let frames = [];      // the ring buffer of recorded frames
let head = 0;         // slot holding the newest frame
let stored = 0;       // how many slots are filled so far
let towers = [];
let mode = 1;
const names = ['', 'vertical strips', 'diagonal', 'radial (mouse)', 'noise time map'];

function setup() {
  createCanvas(640, 360);
  pixelDensity(1);
  for (let i = 0; i < BUF; i++) {
    let g = createGraphics(width, height);
    g.pixelDensity(1);
    g.noStroke();
    frames.push(g);
  }
  // build a random skyline once
  let x = 0;
  while (x < width) {
    let w = random(30, 70);
    towers.push({ x: x, w: w, h: random(80, 230), seed: floor(random(10000)) });
    x += w + random(2, 8);
  }
}

// draws the scene at time t (0 = midday, 1 = night) into graphics g
function drawScene(g, t) {
  let day = color(120, 180, 235);
  let dusk = color(240, 120, 70);
  let night = color(15, 20, 45);
  let sky = t < 0.5 ? lerpColor(day, dusk, t * 2) : lerpColor(dusk, night, (t - 0.5) * 2);
  g.background(sky);
  g.fill(255, 230, 150, 255 * (1 - t));            // the sun fades as it sinks
  g.circle(g.width * 0.7, lerp(60, g.height - 40, t), 50);
  for (let b of towers) {
    g.fill(lerpColor(color(70, 80, 95), color(10, 10, 20), t));
    g.rect(b.x, g.height - b.h, b.w, b.h);
    randomSeed(b.seed);                             // same windows every time
    g.fill(255, 210, 120);
    for (let y = g.height - b.h + 8; y < g.height - 8; y += 14) {
      for (let x = b.x + 5; x < b.x + b.w - 8; x += 12) {
        if (t > random(0.4, 1)) g.rect(x, y, 6, 8); // each window lights at its own moment
      }
    }
  }
}

// returns a recorded frame by age: 0 = newest, stored - 1 = oldest
function frameByAge(age) {
  age = constrain(floor(age), 0, stored - 1);
  return frames[(head - age + BUF) % BUF];
}

function draw() {
  // 1. record: every INTERVAL calls, paint the scene into the next slot
  if (frameCount % INTERVAL === 0 || stored === 0) {
    head = (head + 1) % BUF;
    let t = 0.5 - 0.5 * cos(TWO_PI * frameCount / DAY);
    drawScene(frames[head], t);
    stored = min(stored + 1, BUF);
  }
  // 2. rebuild the canvas from different moments
  if (mode === 1) drawStrips();
  else drawTimeMap();
  fill(255);
  noStroke();
  textSize(13);
  text('mode ' + mode + ': ' + names[mode] + '   (keys 1-4)', 10, 20);
}

function drawStrips() {
  let slices = floor(map(mouseX, 0, width, 4, 64, true));
  let sw = width / slices;
  for (let i = 0; i < slices; i++) {
    // left strip is the oldest moment, right strip the newest
    let age = map(i, 0, slices - 1, stored - 1, 0);
    let sx = floor(i * sw);
    let w = min(ceil(sw) + 1, width - sx);
    image(frameByAge(age), sx, 0, w, height, sx, 0, w, height);
  }
}

function drawTimeMap() {
  for (let y = 0; y < height; y += CELL) {
    for (let x = 0; x < width; x += CELL) {
      let v; // 0..1: how far back in time this block looks
      if (mode === 2) v = (x + y) / (width + height);
      else if (mode === 3) v = constrain(dist(x, y, mouseX, mouseY) / 400, 0, 1);
      else v = noise(x * 0.008, y * 0.008, frameCount * 0.004);
      image(frameByAge(v * (stored - 1)), x, y, CELL, CELL, x, y, CELL, CELL);
    }
  }
}

function keyPressed() {
  if (key >= '1' && key <= '4') mode = int(key);
}
For a next step, change INTERVAL from 4 to 1 and then to 12, keeping BUF the same. The screen will show the “minutes between slices” column from the Marker-Moore table: small intervals give a smooth gradient and large ones give bold blocks of light. Then rebuild the same time map in TouchDesigner, with a Ramp TOP driving a Time Machine TOP, and compare how each tool handles a full-resolution buffer.
On this article
- Facts were checked against the sources below before publication.
- Published
Sources (8)
- Time Slicing - TouchDesigner Documentation (derivative.ca)
- Time Slice CHOP - TouchDesigner Documentation (docs.derivative.ca)
- Noise CHOP - TouchDesigner Documentation (docs.derivative.ca)
- Perform CHOP - TouchDesigner Documentation (derivative.ca)
- Slit Scan using the Time Machine TOP - Derivative Learn (learn.derivative.ca)
- tip-bot: sched/fair: rename min_granularity to base_slice (EEVDF) (patchew.org)
- LKML discussion on EEVDF tick preemption and base slice (lkml.iu.edu)
- [tip: sched/core] sched: Reduce the default slice to avoid tasks getting an extra tick (lkml.rescloud.iu.edu)